Joomla!,Wordpressでサイトを構築するためのヒント

Joomla!からWordpressへ記事を変換してみる

公開日| 2010年04月01日 | 1つのコメントがあります。

今回は、Joomla!の記事をWordpressへコンバートすることを考えてみたいと思います。
そのためにphpスクリプトは、いろいろな人によって提供されていますが、今回は、下記のサイトで提供されているphpスクリプトを元に実行してみたいと思います。

参考記事:Joomla to WordPress, Content Converter

wp-config.phpを編集する

まずは、先に参考記事からphpスクリプトファイルをダウンロードします。
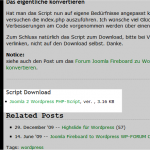

ダウンロードしたZIPファイルを適当なディレクトリへ解凍します。

config.phpファイルの編集を行います。

1
2
3
4
5
6
7
8
9
10
11
12
13
14
15
16
17
18
19
20
21
22
23
24
25
26
27
28
29
<?php
/* 
 * Configuration for your Database and stuff
 */
 
$SQL['HOST'] = "sql.lan";   // Normaly localhost
$SQL['USR'] = "user";
$SQL['PWD'] = "pass";
 
// Joomla realted ->
$SQL['JOOMLA_DB'] = "solariz_de"; // Databse name of Joomla
$SQL['JOOMLA_PRE'] = "jos_";    // Table Prefix of Joomla Tables
 
// WordPress realted ->
$SQL['WP_DB'] = "solariz_wp"; // Databse name of wordpress
$SQL['WP_PRE'] = "wp_";       // Table Prefix of wordpress Tables
 
$DEFAULTS['POST_AUTHOR']   = 1; // User ID of target Author (1 usualy admin)
$DEFAULTS['POST_CATEGORY'] = 5; // I suggest to create a category named e.g. import


// If you are done with your configuration comment the next line out
// or set it to false.
$NOT_CONFIGURED = true;
 
//EOF: No PHP Endtag to avoid messup of headers

5行目 : データベースのサーバー名あるいはIPアドレスを指定します。
6行目 : データベースへアクセスするためのユーザ名を指定します。
7行目 : データベースへアクセスするためのパスワードを指定します。

11行目 : Joomla!のデータベース名を指定します。
12行目 : Joomla!で使っているサフィックスを指定します。
Joomla!のインストールディレクトリに”configuration.php”があると思いますので、そのファイルの以下の部分を確認してください。
以下の例では、12行目は、”jos_”と指定することになります。

	var $dbprefix = 'jos_';					// Do not change unless you need to!

14行目 : WordPressのデータベース名を指定します。
15行目 : WordPressで使っているサフィックスを指定します。
Wordpressのインストールディレクトリに”wp-config.php”があると思いますので、そのファイルの以下の部分を確認してください。
以下の例では、14行目は、”wp_”と指定することになります。

$table_prefix  = 'wp_';

最後に、

27行目 : $NOT_CONFIGURED = false;

と書き変えて保存します。

functions.inc.phpを編集する

functions.inc.php では、関数がいくつか記述されています。
この中で、Wordpressへのデータ情報を編集する箇所に、若干、不具合がありますので、それを修正します。

[変更前]

57
58
59
60
61
62
63
    foreach ($array as $k => $v) {
        if($k AND $v) {
            if($inserted > 0) $query .= ",";
            $query .= "`".$k."` = '".mysql_escape_string(str_replace("`","",$v))."'";
            ++$inserted;
        }
    }

[変更後]

57
58
59
60
61
62
63
64
65
66
67
68
69
    $inserted = 0;
    foreach ($array as $k => $v) {
        //if($k AND $v) {
        if($k ) {
            if($inserted > 0) $query .= ',';
            if($v){
                $query .= '`'.$k."` = '".mysql_escape_string(str_replace("`","",$v))."'";
            } else {
                $query .= '`'.$k."` = ''";
            }
            ++$inserted;
        }
    }

57行目 : $insertedが何も設定されていないのに参照されている不具合を修正。
ループ処理で、Wordpressへ設定すべきデータの値が何も設定されていない場合でも、空の値を設定するように変更しています。

index.phpを編集する

index.php では、メインの処理が記述されています。
この中で、Wordpressへのデータ情報を編集する箇所に、若干、不具合がありますので、それを修正します。

37
38
if(function_exists(set_time_limit)) set_time_limit(1800);
else                                $OUT .= "<li>Warning: cant't execute set_time_limit() script may abort...";

この部分は、phpスクリプトの最大処理時間を変更しています。
レンタルサーバーなどでは、設定できない場合もあります。そのため、今回は、WEBからの起動を行わず、コンソールからの起動を行うようにし、上記の箇所をコメントアウトします。

続けて、Wordpressへの設定の際に必要なカラム情報が抜けていますので、それを追加します。
[変更前]

58
59
60
61
62
63
64
65
66
67
68
69
70
71
72
73
74
75
76
77
78
79
80
    $array = array(
        "post_author"=>$DEFAULTS['POST_AUTHOR'],
        #"post_parent"=>$DEFAULTS['POST_CATEGORY'],
        "post_date"=>$R['created'],
        "post_date_gmt"=>$R['created'],
        "post_modified"=>$R['modified'],
        "post_modified_gmt"=>$R['modified'],
        "post_title"=>$R['title'],
        "post_status"=>"publish",
        "comment_status"=>"open",
        "ping_status"=>"open",
        "post_name"=>$R['alias'],
        "post_type"=>"post"
    );
    if($R['fulltext'])  $array["post_content"] = $R['fulltext'];
    elseif($R['introtext'] AND !$R['fulltext']) $array["post_content"] = $R['introtext'];
 
	// Content Filter
	$array["post_content"] = str_replace('<hr id="system-readmore" />',"<!--more-->",$array["post_content"]);
	$array["post_content"] = str_replace('src="images/','src="/images/',$array["post_content"]);
 
 
    $sql_query[] = wpBuildQuery($SQL['WP_PRE']."posts", $array);

[変更後]

58
59
60
61
62
63
64
65
66
67
68
69
70
71
72
73
74
75
76
77
78
79
80
81
82
83
84
85
86
87
88
89
90
91
92
93
94
95
    $array = array(
        "post_author"=>$DEFAULTS['POST_AUTHOR'],
        #"post_parent"=>$DEFAULTS['POST_CATEGORY'],
        "post_date"=>$R['created'],
        "post_date_gmt"=>$R['created'],
        "post_modified"=>$R['modified'],
        "post_modified_gmt"=>$R['modified'],
        "post_title"=>$R['title'],
        "post_status"=>"publish",
        "comment_status"=>"open",
        "ping_status"=>"open",
        "to_ping"=>"",
        "pinged"=>"",
        "post_content_filtered"=>"",
        "post_name"=>$R['alias'],
        "post_type"=>"post"
    );
 
    if($R['fulltext'])  $array["post_content"] = $R['fulltext'];
    elseif($R['introtext'] AND !$R['fulltext']) $array["post_content"] = $R['introtext'];
 
	// Content Filter
	$array["post_content"] = str_replace('<hr id="system-readmore" />',"<!--more-->",$array["post_content"]);
	$array["post_content"] = str_replace('src="images/','src="/images/',$array["post_content"]);
 
	//	if your system do not support MB String, you should use functons(ex. strpos, substr ,etc,.) for normal strings.
	$pos = mb_strpos($array['post_content'], '<!--more-->',0,'UTF-8');
	if($pos===false){
		if(mb_strlen ($array['post_content'],'UTF-8')>128){
			$array['post_excerpt'] = mb_substr($array['post_content'],0,128,'UTF-8');
		} else {
			$array['post_excerpt'] = $array['post_content'];
		}
	} else {
		$array['post_excerpt'] = mb_substr($array['post_content'],0,$pos,'UTF-8');
	}
 
    $sql_query[] = wpBuildQuery($SQL['WP_PRE']."posts", $array);

80行目 : ‘post_excerpt’は、Wordpressでの記事の概要です。この情報を最大128文字以内で簡単に編集しています。

ここまで編集を終えたら、いよいよ記事の変換を実行します。

記事を変換する

本来、Jooma2Wordpressは、WEB画面から実行できるようになっています。
しかし、先にも記述したように処理時間や負荷の関係から、コンソールから実行します。

カレントディレクトリを先のphpスクリプトのあるディレクトリへ移動し、以下のイメージでコマンドを入力、実行します。

> php index.php > error.log

もし、エラーが発生した場合、error.logに記述されるでしょう。
特別エラーが発生しなかったら、以下のような出力イメージになるでしょう。

<!DOCTYPE HTML PUBLIC "-//W3C//DTD HTML 4.01 Transitional//EN">
<html>
	<head>
		<meta http-equiv="Content-Type" content="text/html; charset=UTF-8">
		<title>Joomla 2 WordPress by www.solariz.de</title>
	</head>
<body>
<li> Processing 125 Posts...<br><li>Inserted 125 ID's
</body>
</html>

以下の行が大事です。特にエラーがなければ、左右の数字は同じになります。
<li> Processing 125 Posts…<br><li>Inserted 125 ID’s

完了したら、Wordpress側をWEBでアクセスしてみてください。
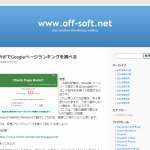
これは、www.off-soft.net のjoomla!の記事をWordpressへ変換したときの様子です。

注意点

このやり方では、記事のみが変換されるだけです。
メニューやセクション、カテゴリ及びプラグインで設定されているデータベース情報などは、何も変換されないことに注意する必要があります。

このphpスクリプトをベースに、個別に少し手を加えれば、ほとんど自動的に変換できそうですね。

joomla2wordpress php script - joomla2wordpress php script


コメント

One Response to “Joomla!からWordPressへ記事を変換してみる”

  1. Tweets that mention How to convert from posts of Joomla! to Wordpress | Joomla!, Wordpress tips for building your site — Topsy.com
    2010年04月02日 @ 21:00:10

    […] This post was mentioned on Twitter by Dan James, Kind Canine. Kind Canine said: How to convert from posts of Joomla! to WordPress | Joomla …: Joomla!, WordPress tips for building your site. Jo… http://bit.ly/aVorZX […]

コメントをどうぞ


翻訳

最近の記事

カテゴリー

タグクラウド

execute remove フロントページ 投稿ページ トップページ install WIndows Note Convert META generator 日付 donwload file manage multibyte utf-8 unicode shiftjis euc console サイトマップ 問題 ParmaLink Redirect パーマリンク はみ出る pre テンプレート テーマ タグクラウド マルチランゲージ リダイレクト PHP(タグ) タグ table control HTML(タグ) コマンド 国際化(翻訳) SQLite(タグ) MySQL(タグ) qTranslate プラグイン(タグ) Wordpress(タグ)

リンク

このサイトは?

Joomla!,WordpressなどCMSを使ったサイト構築、サイト管理からソフトウェアの使用方法、開発環境までのヒントを記述します。

  • はてなブックマークへ追加する
  • Facebookでシェアする
  • twitter でつぶやく
  • Google Plusでシェアする
  • Pocketでシェアする
ページトップへ